 English
- English
-
 Español
 -
 Português
 -
 русский
 -
 français
 -
 日本語
日本語 -
 Deutsch
 -
 Tiếng Việt
 -
 Italiano
 -
 Nederlands
 -
 ไทย
ไทย -
 Polski
 -
 한국어
한국어 -
 Svenska
 -
 magyar
 -
 Malay
Malay -
 বাংলা
বাংলা -
 Dansk
Dansk -
 Suomi
Suomi -
 हिन्दी
 -
 Pilipino
 -
 Türk
Türk -
 Gaeilge
 -
 عربى
عربى -
 Indonesia
 -
 norsk
norsk -
 اردو
اردو -
 čeština
 -
 Ελληνικά
 -
 Українська
 -
 Javanese
 -
 فارسی
فارسی -
 தமிழ்
தமிழ் -
 తెలుగు
 -
 नेपाली
 -
 Burmese
 -
 български
 -
 ລາວ
ລາວ -
 Қазақ
Қазақ -
 Euskal
 -
 Azərbaycan
 -
 slovenský
 -
 Македонски
 -
 Lietuvos
 -
 Eesti Keel
 -
 Română
 -
 Slovenski
 -
 मराठी
मराठी -
 Српски


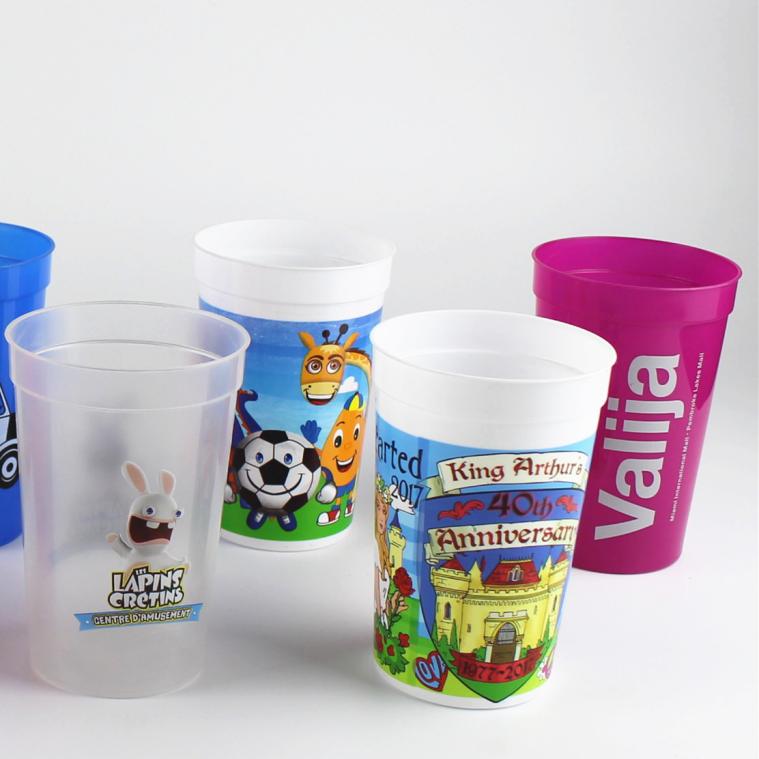
How to Heat Transfer on Plastic Cups
2024-01-19
Introduction:
Heat transfer is a popular printing method that allows individuals to create unique and customized designs on various items, including plastic cups. This process involves transferring a design from a heat-sensitive paper to the surface of the cup using a heat press machine. If you are looking to create personalized plastic cups, read on to learn how to heat transfer on plastic cups.
Materials Needed:
Plastic cups
Heat-sensitive paper (also known as transfer paper)
Design or artwork (printed in reverse)
Scissors
Heat press machine
Teflon sheet or parchment paper
Timer
Instructions:
Prepare the Design: Before you begin, create your desired design on a computer using graphic design software. Ensure that the design is printed in reverse, as the heat transfer process will reverse the image onto the cup. Print the design on a heat-sensitive paper that is compatible with plastic cups.


Cut the Design: Use scissors to carefully cut out the design from the heat-sensitive paper. Make sure to remove any excess paper around the design, leaving only the outline of the image.
Position the Design on the Cup: Place the cut-out design on the surface of the plastic cup. Position it in the desired location, ensuring that it is centered and straight.
Prepare the Heat Press Machine: Set the heat press machine to the appropriate temperature and time settings for heat transferring on plastic cups. The temperature typically ranges from 150°C to 160°C, and the time may vary depending on the thickness of the cup and the design. Place a Teflon sheet or parchment paper on the bottom plate of the heat press machine to prevent the cup from sticking.
Heat Transfer Process: Once the heat press machine is ready, carefully place the cup with the design on the machine’s upper plate. Close the machine, making sure that the cup is securely positioned. Start the timer and wait for the specified time to elapse. During this time, the heat and pressure from the machine will transfer the design from the heat-sensitive paper to the cup’s surface.
Remove the Cup: After the timer goes off, carefully open the heat press machine and remove the cup. Allow the cup to cool down completely before handling it. Once cooled, you can peel off the heat-sensitive paper to reveal the transferred design on the cup.
Final Touches: If desired, you can add additional touches to your customized cup. You can paint over the transferred design with acrylic paint or apply a clear coat to protect the design from scratches and fading.
Conclusion: Heat transferring on plastic cups is a fun and creative way to personalize your cups. By following the simple steps outlined in this article, you can easily create unique designs that will make your cups stand out. Remember to use the appropriate materials and settings for the best results. Happy heat transferring!
Heat Transfer Printing Video taken in SUAN Plastic Cup Factory:
Welcome to contact us to custom heat transfer printing plastic cups! Our team will give you a best price within 24 hours.


